To help train the next generation of plumbers, Kenneth Vance, training manager at Salamander Pumps, took to New Durham College to demonstrate how to successfully install a shower pump. Here, he gives us his top tips from the day…
Check the pump’s suitability
There are two types of shower pumps – positive heads and negative (universal) heads, but knowing which one is best for the job, and the differences between the two, is crucial when choosing the correct shower pump. In cases where any point in the system after the pump, such as outlet pipework, shower heads or taps goes within 600mm of the base of the cold water tank or above, a negative head (universal) pump would be the best option.
However, if you are unsure a universal pump is suitable for both positive head and negative head installations. 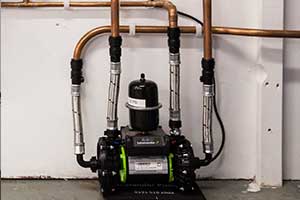
Check the water temperature
It’s essential that water temperature is kept to a maximum of 60-65 degrees to avoid damage to the pump. However, if water temperature is something that you’re not able to control, you can fit a Salamander Pumps blending valve with the shower pump, to bring the water temperature down to within this limit.
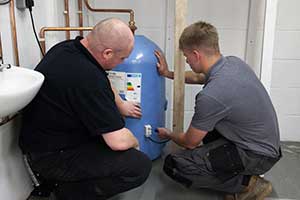
Inspect the cold water capacity
One of the most important steps when installing a pump is to make sure that there’s enough cold water storage for the property - 227 litres (50 gallons) is normally adequate for a bathroom.
 If you intend to run more than one bathroom, then you need to allow 227 litres (50 gallons) for each bathroom and 136 litres (30 gallons) for each shower room or en-suite in the property, even if only one is being pumped.
Consider the pump’s location
A pump should always be fitted within 4-5m in pipe length (depending on the pump type) from the hot water cylinder outlet to the pump hot water inlet. This is mainly due to the fact that pumps are mostly designed to push rather than pull water.
The best position for the pump is at the base of the hot water cylinder, as close as possible to the cylinder. However, another important factor to consider is ensuring the pump is in a location where it will be protected from frost. Fitting pumps in a loft should be avoided if possible, as this will expose it to freezing conditions during the winter and cause damage to the pump.
Connecting the hoses 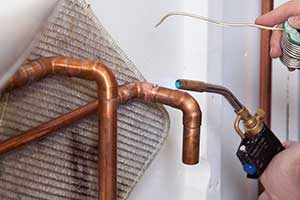
Salamander’s hoses have an anti-vibration design which reduces noise by limiting the vibration between the pump and the pipework. This design means that the hoses are not designed to be a ‘flexi connector’ and should therefore not be bent more than 30-35 degrees during installation, if at all. Bending or twisting the hose will cause problems with the water flow and may also invalidate the warranty, so it’s crucial that the hoses are fitted as straight as is possible.
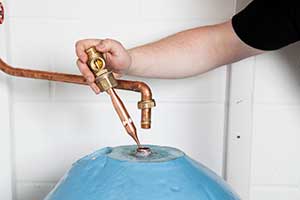
Connect the flange
The best method of eliminating air in the system is to fit an appropriate and approved anti-aeration flange which will encourage aeration to follow a natural path to vent and provide the pump with a dedicated, anti-aerated flow of water. This will prevent cavitation, which can damage to a pump’s impellers and seals, as well as causing increased pump noise.
 It’s important to check the fitting guide to make sure an appropriate flange is used, some of these include the Salamander S-Flange, Surrey, Warix and Essex Flange.
However in some installations, due to continuous product improvement, regenerative pumps (for example, the Salamander CT range) can be ‘teed’ from the first tee on the downward leg, so long as it’s the first take off before any other feeds, along with a few other requirements that can be found in the installation manual. This limits the aeration going to the pump and avoids the need for a flange.
Avoid flux damage during soldering
Due to the spitting of the flux during the sweating process, it’s important to properly protect the pump to prevent damage. If flux comes into contact with the pump or the hose, the residue will react with moisture particles in the air. Gradually, this erodes the pump and after a period of time, usually within a few months to a year, can cause pin-prick holes and cracks in the product, resulting in water leaks.
It’s important to make sure you don’t just attempt to protect the pump during this sweating process by covering it with some form of material, as this can be ineffective due to the spitting. The best way to ensure the flux avoids all contact with the pump is to ensure all solder joints are completed and flux residues removed prior to the pump connection.
To do this, ensure all fittings are in the correct place and ready to be soldered, before then removing the pump and hoses placing them a distance away while the soldering is completed. Only after this phase is finished should the pump then be re-introduced to the fitting and secured into place.
Add new comment